Getting Started
This guide walks you through using Agent Health to evaluate AI agents. The application includes a Travel Planner multi-agent demo so you can explore all features without configuring external services.
Prerequisites
Section titled “Prerequisites”Required:
- Node.js 18+ — download here
- npm (comes with Node.js)
Optional (for production use):
- AWS credentials (for Bedrock LLM Judge)
- OpenSearch cluster (for persistence and traces)
node --version # Should be v18.0.0 or highernpm --version # Should be v8.0.0 or higherInstall and start
Section titled “Install and start”Run Agent Health with npx (no installation needed):
npx @opensearch-project/agent-health@latestWhat happens:
- Downloads Agent Health (if first run)
- Starts the server on port 4001
- Opens your browser to http://localhost:4001
- Loads sample data automatically
For frequent use, install globally:
npm install -g @opensearch-project/agent-healthagent-healthDemo Agent and Judge
Section titled “Demo Agent and Judge”Agent Health includes a built-in Travel Planner multi-agent demo, along with a Demo Judge, for testing without external services.
Demo Agent (Travel Planner)
Section titled “Demo Agent (Travel Planner)”- Simulates a multi-agent Travel Planner system with realistic trajectories
- Agent types: Travel Coordinator, Weather Agent, Events Agent, Booking Agent, Budget Agent
- No external endpoint required — select “Demo Agent” in the agent dropdown
Demo Judge
Section titled “Demo Judge”- Provides mock evaluation scores without AWS Bedrock
- Automatically selected when using Demo Agent
- No AWS credentials required
Sample data
Section titled “Sample data”The Travel Planner demo includes pre-loaded sample data:
| Data Type | Count | Description |
|---|---|---|
| Test Cases | 5 | Travel Planner multi-agent scenarios |
| Experiments | 2 | Demo experiments with completed runs |
| Runs | 6 | Completed evaluation results across experiments |
| Traces | 5 | OpenTelemetry trace trees for visualization |
Sample data IDs start with demo- prefix and are read-only.
Explore the dashboard
Section titled “Explore the dashboard”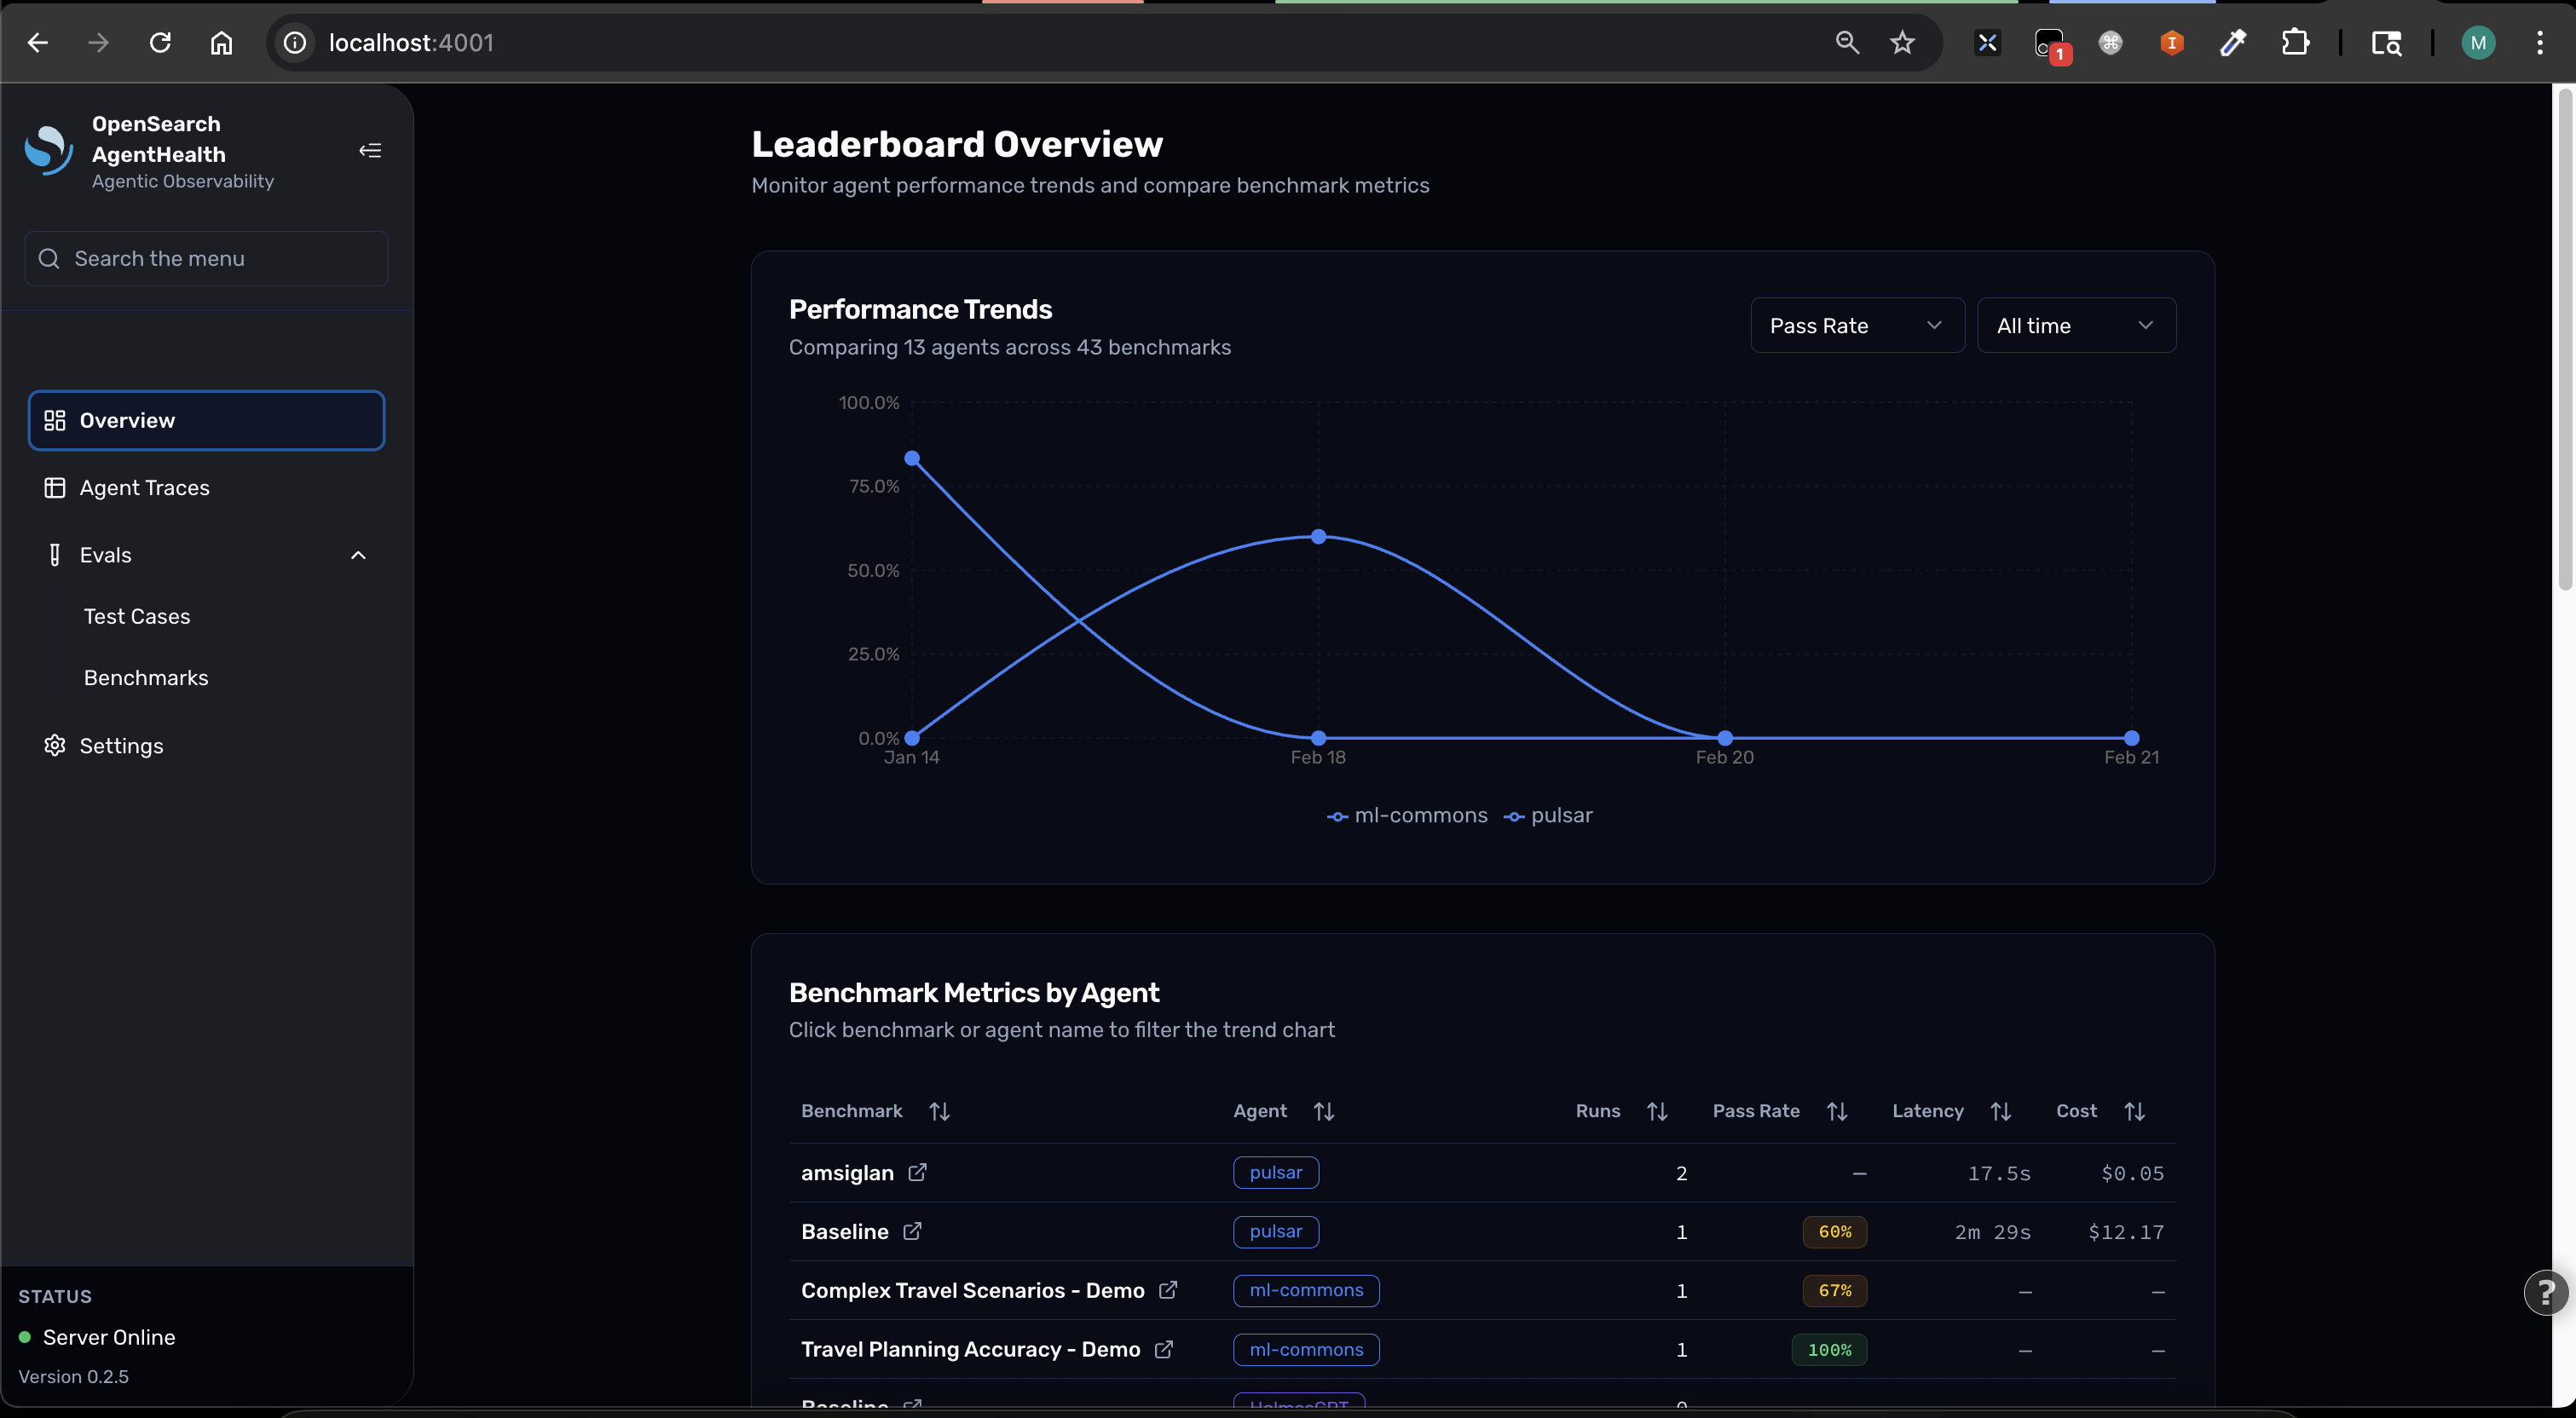
The main dashboard displays:
- Active experiments and their status
- Recent evaluation runs
- Quick statistics on pass/fail rates
Run your first evaluation
Section titled “Run your first evaluation”Option A: Run from UI
Section titled “Option A: Run from UI”- Click Evals in the sidebar
- Click New Evaluation
- Configure:
- Agent: Select “Demo Agent”
- Model: Select “Demo Model”
- Test Case: Select any Travel Planner scenario
- Click Run Evaluation
The agent streams its execution in real-time. You’ll see thinking steps, tool calls, and responses, followed by an LLM judge evaluation with pass/fail status and accuracy score.
Option B: Run from CLI
Section titled “Option B: Run from CLI”# List available test casesnpx @opensearch-project/agent-health list test-cases
# Run a specific test casenpx @opensearch-project/agent-health run -t demo-otel-001 -a demo
# View the results in the UIopen http://localhost:4001/runsUnderstand trajectory steps
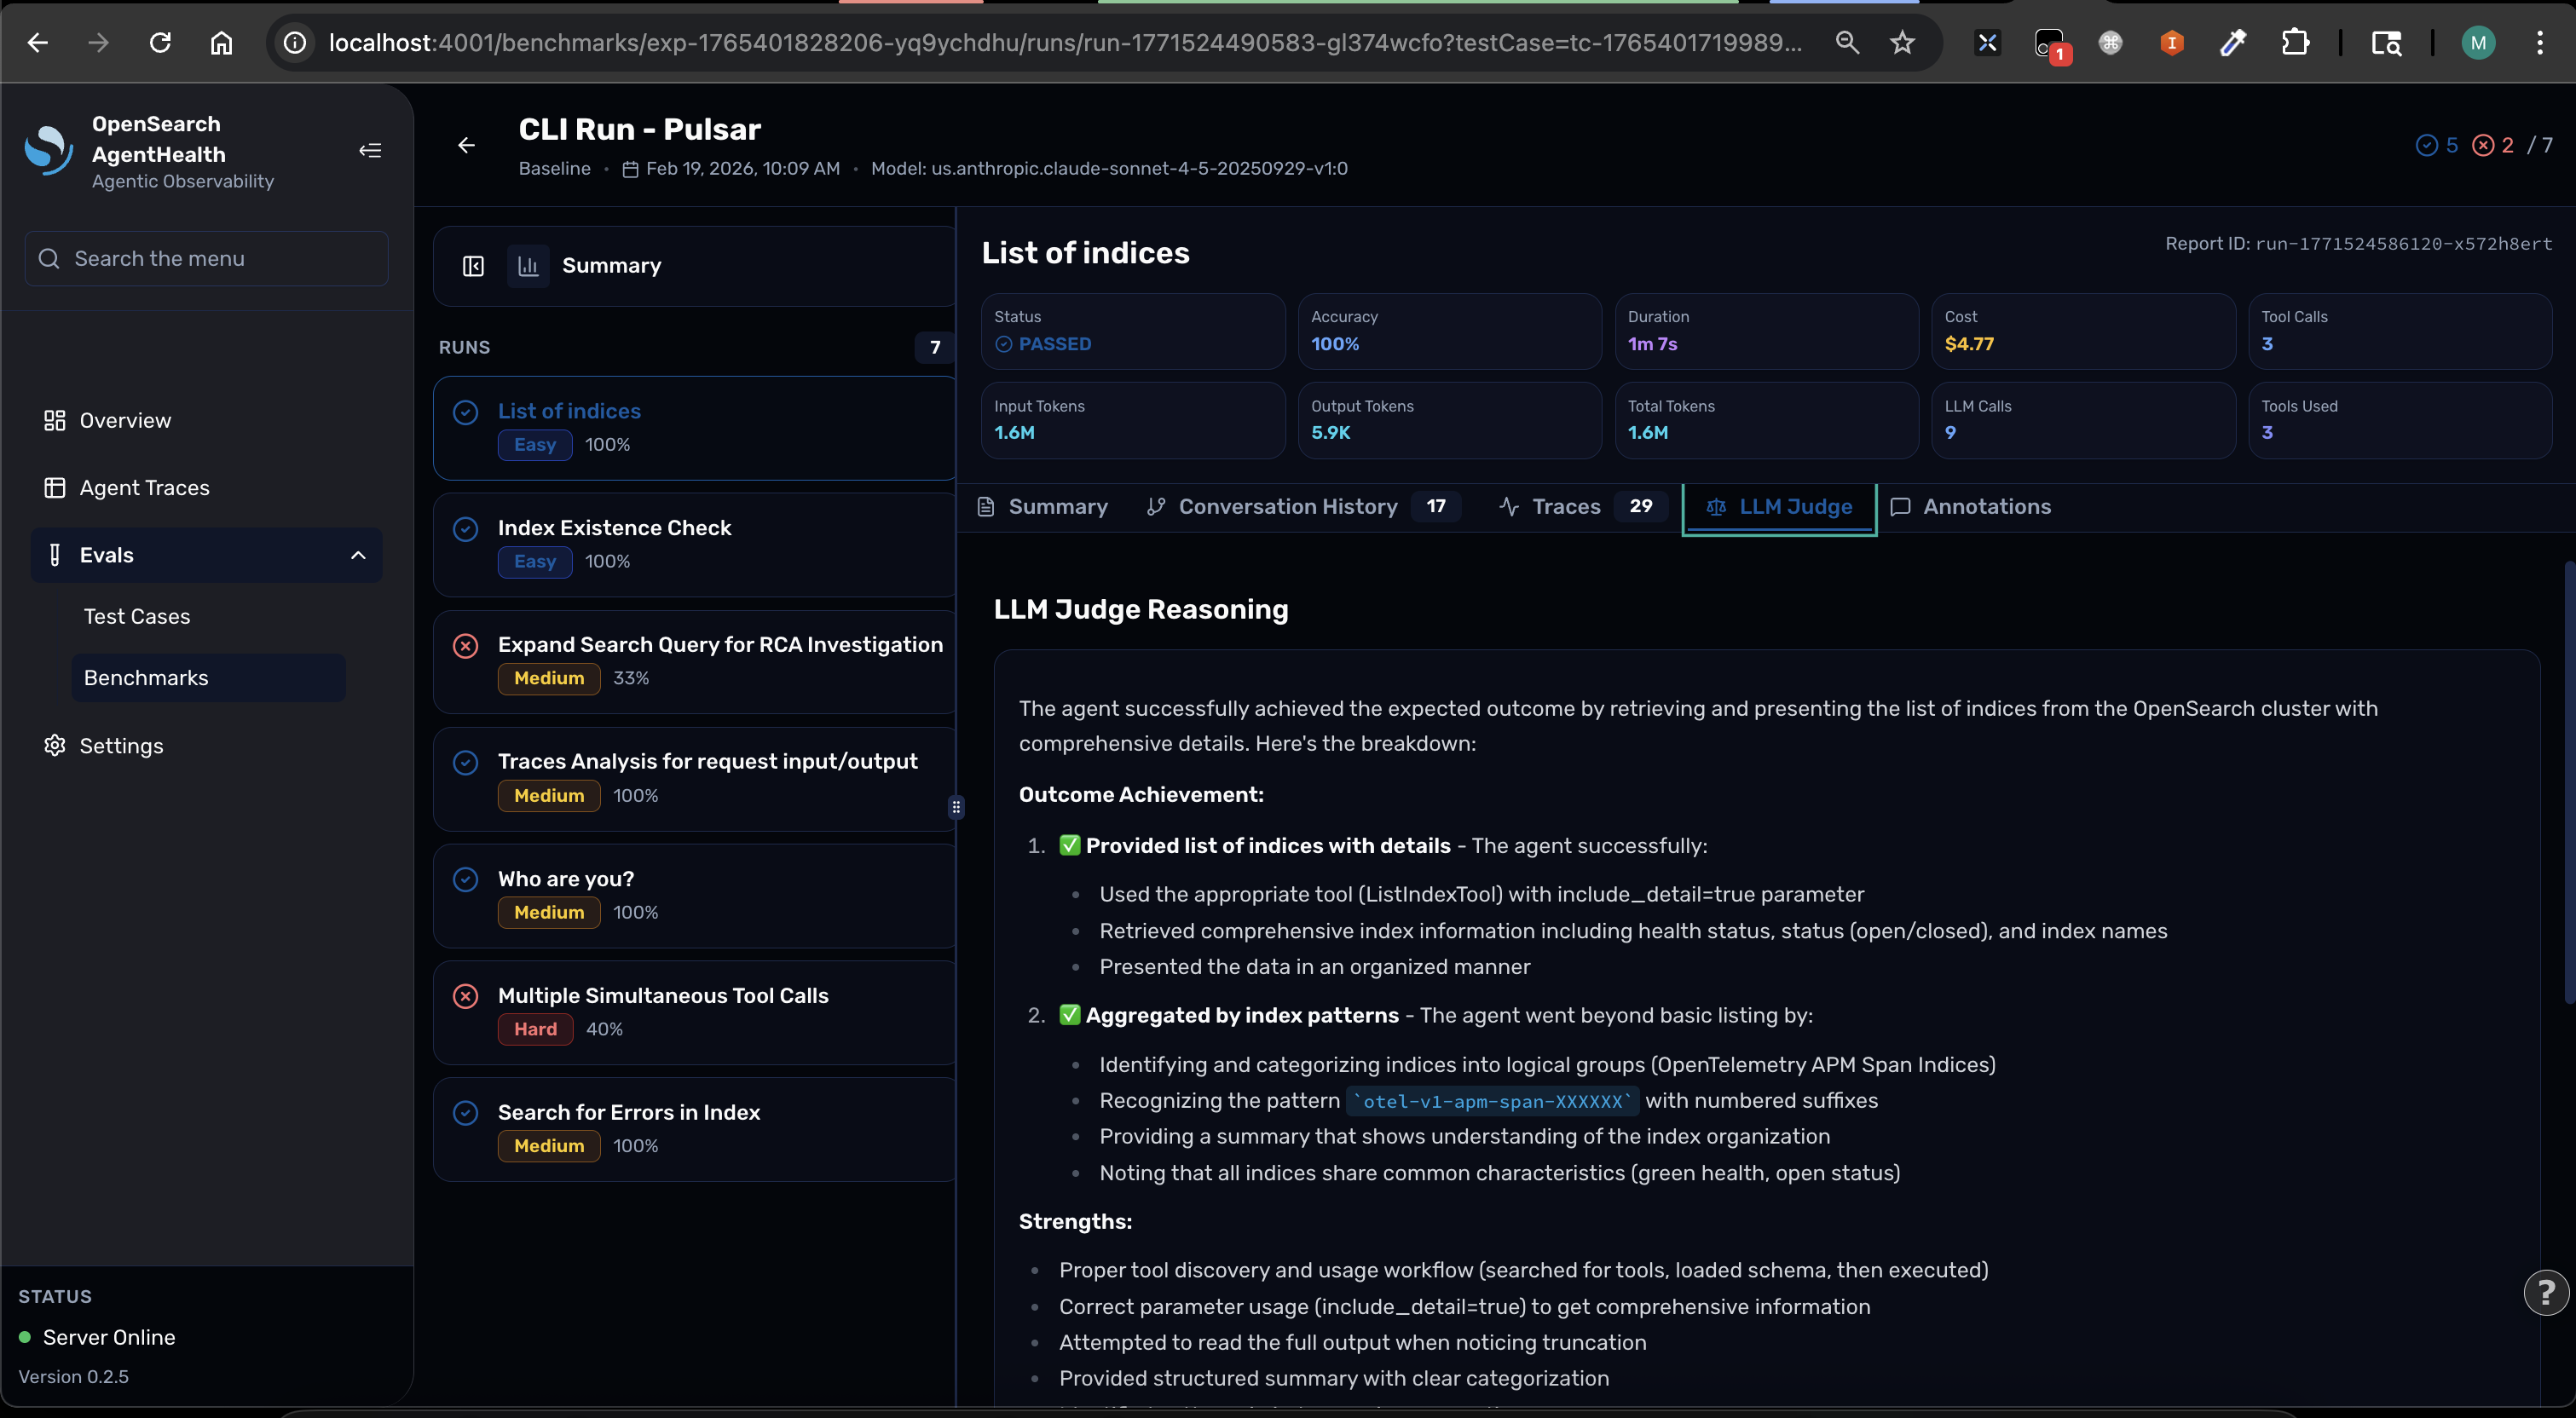
Section titled “Understand trajectory steps”Click on any evaluation result to view the detailed trajectory:
| Step Type | Description | Example |
|---|---|---|
| thinking | Agent’s internal reasoning | ”I need to check the weather forecast…“ |
| action | Tool invocation | searchFlights({ destination: "Paris", dates: "Mar 15-18" }) |
| tool_result | Tool response | { flights: [...], cheapest: "$450" } |
| response | Final conclusion | ”Here’s your optimized 3-day Paris itinerary…” |
Each step shows timestamp, duration, tool arguments (for actions), full tool output (for tool_results), and the judge’s evaluation reasoning.
Next steps
Section titled “Next steps”- Connect your own agent — configure Agent Health for your agent
- Create custom test cases — build test cases for your domain
- Run experiments — batch evaluate across agents and models
- View traces — visualize OpenTelemetry traces from your agent